Posts filed under ‘techniques’
Best Friends
New Year, new post! Life has been busy, with dissertating and living and all that, but I wanted to show you all what I’ve been working on most recently in the knitting world. Meet Hibou and Étoile, the very best of friends:

Ravelry Project pages: Hibou and Étoile
The inspiration for this charming duo comes from an absolutely adorable YouTube video I stumbled across, of Twinkle Twinkle Little Star. In it, a cheery owl decides to take an adventure up into the sky, to see what that star is really all about. The star and owl exchange friendly glances, and holding hands, go off on a playful frolic through the clouds. Eventually, realizing that they belong to two different worlds, the star and owl regretfully part, but the implication is that their friendship endures. Or something like that.
What is undeniable is how cute it is. And how absolutely intoxicating it is for my toddler, who would watch it 15 times in a row if you let him. So, for the holidays, I decided I’d make a pair of stuffed animals so that he could have his own starry adventures. I’m incredibly proud of how these came out (especially the owl) and I hope that sometime I get around to writing up a detailed pattern, so that others can have adorable owls too. For now, though, I’m happy to share the basics of construction, which can possible help inspire you to try something similar yourself! A lot of people think that stuffed animals are a lot of sewing up…but these are practically seamless. A little fiddly, yes, but almost no sewing involved.
I started off with the star, because it was the most straightforward in my mind. I’ve made knitted stars before, although my last star was started along the outside, with decreases forming sharp lines along the radii, which was something I wanted to avoid in this star.

For Étoile, I started in the center and worked outward, with lifted increases, to try to minimize the overall visual appearance of the increases. I also decided to have the increases fall along the “armpits” of the star, and then work the peaks separately afterward. So, I cast on 5, joined in the round, and increased in 5 places every single round, alternating left- and right-leaning lifted increases.
When the body of the star seemed big enough, I put it on a holder, and then did the same thing again, so I had two pentagons. Then the fun part. Lining up front and back, with the purl sides together, I worked in the round over 1/5 of the star’s front and 1/5 of the star’s back (from “armpit” to “armpit”). Here, I did double decreases at both sides every other round, to make a “seam” look that would actually be seamless. I did the same thing for each of the points, picking up stitches at the corners to avoid gaps (like you would for glove fingers), until there was just 1 point left.

At this point, I wove in the ends that I could, and stuffed the whole thing. Once stuffed, I decided on the placement of facial features, and used a pair of black glossy safety eyes, backed with a small circle of white felt, to make eyes. The mouth and eyebrows were done with black embroidery floss, and not being an embroiderer, I probably didn’t do this the most efficient or effective way. But, to make the large filled areas for both mouth and eyebrows, first I stitched the outline of the shape I wanted to fill, using 2 plies of floss (I don’t have any pictures of this process, as it was done in hiding and in a rush in the nights before Christmas!). I did the outline in split stitch, and fairly small stitches, to be as secure as I could on the loose knitted fabric. Then, I sort of made up a fill stitch – it’s like satin stitch, except that it’s not flat and it doesn’t totally encircle the fabric it’s worked on – it makes figure-8s between the two rows of split stitches, only on the surface of the knitting. I don’t know what it’s called – do you?
Anyhow, I filled in these shapes, then went to work setting in the eyes, so they’d look more naturalistic and less bug-eyed. To do this, I used 2 plies of the yellow yarn (Cascade 220 SW) and a long soft-sculpture needle, and essentially just sewed the fabric just around/behind the eyes to the stuffing beneath it. I secured off as best I could, finished knitting the last point, stuffed the last bit before finishing, and secured off the final end, tucking it back inside the stuffing to finish.

The owl was trickier. I started with the legs, and made two crown-down “hats”, each with 5 increases every other round. When they were big enough, I joined them together in the round, and worked some short rows to fill in the gaps in the front and back. Pretty quickly, I realized that the owl was a lot fatter than I’d planned him to be, so instead of having his wings come straight out from his body, I decided to do “raglan wings” and have the body gradually taper up to the neck. I had to do some tinkering with this, but it paid off. The front and back were worked flat, and then rejoined in the round for the neck. I did some quick decreases followed by some quick increases to make the neck shaping, and then increased in 8 places every other round to make the bottom of the head, worked even a bit, and then decreased in 8 places every other round to make the top of the head. I finished the crown of the head just like a hat, pulling through the small number of remaining stitches.

For the wings, I picked up stitches around the armholes, and worked even about an inch. Then, I did a centered double decrease at the bottom point every other round for a few inches, and then every round until I ran out of stitches. After finishing one wing, I stuffed him and worked on the face features.
The mask was originally going to be made with commercial felt, but I wasn’t happy with the result, so I knitted an 8-shape out of feltable wool (Knitpicks Bare Worsted), and felted it by hand in my kitchen sink. Doing it this way meant I could stop felting as soon as it was the right shape/size, and then I could wet-block it to shape over a ball overnight so it would lie nicely on the face. I sewed it on with a whipstitch.
The beak was made in two triangles, one slightly larger than the other, sewn together, then stuffed with a tiny bit of polyfill and sewn on over the mask.
The ears are little pyramids, with doubled decreases in 3 places every other round, and sewn onto the head using mattress stitch with a little polyfill stuffing inside. To make the eyebrows, I did a bit of applied crochet – single crochet, double crochet, and triple crochet, filling in the space from the eyes to the tips of the ears.
Eyes were the same safety eyes and white felt as the star’s eyes. I set both eyes into the head the same way as I did for the star, using a length of white yarn.
I knitted the other wing, then did a bit of embroidery on the wings using the knitting yarn, quilting some of the stuffing into wingfeathers, and pinching the wing edge so that it puckers like feathers.
Feet are just little lengths of I-cord, sewn on with the leftover ends from the beginnings of the legs.

Hibou!
I hope I have time someday to write this all up in more detail, with elaborations and numbers, but until that day (should it ever come), I hope someone gets inspired to be adventurous and make something adorable!
The Chronicles of Venezia
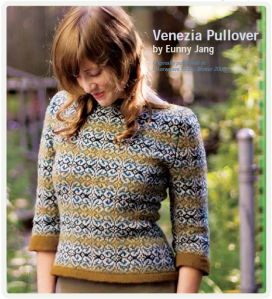
I can’t remember when I first discovered Venezia. I didn’t yet subscribe to Interweave Knits in 2006, but I did fall HARD for Eunny Jang’s designs that winter, when I was living in Russia and knitting to keep sane, so we’ll imagine it was sometime that year, or maybe in my first year of grad school. I added it to my Ravelry queue in August 2008, so maybe it was then. In any case, when I saw this sweater, in its stranded, blue-green glory, I knew it had to be mine.
I eventually bought the pattern, and as I set down to look at the chart, I noticed something interesting, nay, disturbing. The pattern had 9 colors – 5 background shades, but also 4 different “white”s.
 That’s sort of crazy, I thought. Couldn’t this just be done with one white, and a nice range of background colors? Maybe with contrasting edging? So I set to work recoloring the chart, in a more reasonable number of hues. Photoshop is my friend for situations like this:


Armed with this new chart, and yardage estimates, I went to WEBS in pursuit of 2-ply Shetland (this is now December 2010). They had cones of Shetland, but not the 50-gram skeins I was hoping to find. They did have Reynold’s Whiskey, however, which came in close-enough colors to my chart. So, I picked up my colors (I had to order the white online), all 16 skeins of it, and then…sat on it for 2 years.
If you’re a knitter, you’ll understand. First, I needed the right needles, and then, when they arrived, I was in the middle of other projects. And then I was busy, and then it was the summer, and who wants to start a big sweater project in the summer. And then, and then…
Part of it, too, was that I was a little scared. This sweater had a lot of knitting in it. And steeks. And the sizing had to be right. And then I probably would want to tweak things. And really, in 2010, I’d only knitted one or two sweaters, despite having made lots of other pretty things. Sweaters sort of fill their own category. So I waited until the time was right. And apparently, the time was right when I had a squirmy baby in the house and was burnt out on lots of other things in my life. The Venezia was reborn.
By then (August 2012), Reynold’s Whiskey had been discontinued, so I had to cross my fingers that I had enough yarn. Word to the wise, overbuy your yarn. Really, just do it. Luckily, I had plenty of everything, and now have extra enough for a little vest or a sweater for JL, but I’d be so sad if I hadn’t.
The modifications to this sweater were many. First, I lengthened the torso of the sweater, and even then it rides a little short, so I ended up ripping out the original turned hem and adding a long ribbing to bring the edge lower. I mix-and-matched sizes, to make a 38″ hip and a 36″ bust, and changed the increase/decrease rate to go with the new length. It was smooth sailing through the sweater body, and the sleeves too, although I did wait about 6 months between the body and (two-at-a-time magic loop, stranded) sleeves, because it was summer and I was tired of all that colorwork.
Then was the fun part. I decided that there were issues with the construction of the original Venezia – the sleeves were too boxy, and I wouldn’t like a boatneck in scratchy shetland wool, all the way up to my collarbone. So, I wanted to substitute in set-in-sleeves, preferably worked in the round with the body seamlessly to avoid issues lining up the colors in seaming, and to make a V- or scoop-neck. Here’s what I came up with:

So, it’s a little messy, but what you see on the right is the shape of the sleeve cap, in the middle are the armscye decreases, and on the left is the V-neck shaping in black, with the scoop neck shaping and the back-of-neck shaping superimposed in blue. I used some sleeve calculators and a pinch of experience/common sense to figure this out, and then stuck to it pretty faithfully in the knitting. Here’s how it knitted up:

Venezia Left Sleeve – bound off across the top.
You’ll see that the top of the sleeve cap doesn’t reach as high as the body does – at a certain point, you need to bind off the top of the sleeves, and continue with a little steek for the top of the armscye. There is also a steek for the neck in the front, and also a tiny steek for the back neck.

Neck steek on left, armscye steek center.
I then did a strange modified incremental three-needle bind-off over the tops of the shoulders. Here’s what it looked like when I finished knitting, before scissors were introduced:

This is the neck opening, with the front facing down.
This is the least like a sweater that it looked, but soon (the next morning), the scissors came out. I crocheted all the steeks, and soon this happened:


Sweater! (see the scissors in the second photo there?) I have to give some credit to my friend Mira, the first person who ever cut a steek in my presence, for making this moment possible.
It took some experimenting to be happy with the hems and neckline, but eventually, it was done, with a nice corrugated ribbing on the sleeves and neck, inspired by Eunny’s Autumn Rose.

All those color changes meant a whole heck of a lot of loose ends on the inside:

Eep!
I decided that instead of weaving all those ends in, I’d french braid them down the sides. Brilliant! Next time, though, I’ll spit-splice them and not worry about the side seams being a little off, because it’d be pretty near invisible anyway.

Braided arm “seam”
And it was done in time for Rhinebeck! Last year it was too hot for fancy knits, and the year before I was all self-conscious in my Sylvi, but this, this was a Rhinebeck sweater. Perfect.

Playing in the leaves at the Ravelry Meetup, with JL in *his* Rhinebeck sweater.
T-shirt serger-y
I’ve had my serger for almost a year now, and I have to say, I’ve used it very infrequently during that time. Those times I have used it have been fabulous (in particular, finishing the hem on Lauren’s wedding dress), but, perhaps like my beautiful spindles, my spinning wheel, my banjo, guitar, bagpipes, flute…there is a specialized time and place for them, just too seldom. So, the other day, I began my mission to use the serger for good, so as not to let it pine away under its polyurethane dust cloth.
I had the perfect project – my Sock Summit tee. I had only 2 areas of complaint for Sock Summit. The first was the lack of chairs and lounging surfaces at some of the events, and the other was the somewhat disappointing swag array. Despite being an event almost exclusively attended by women, the organizers chose a boxy unisex shirt to sell to attendees. Of course I had to order one, but I was less than thrilled with the fit. A small would have been more flattering, but I’m changing sizes in the bust and waistline pretty rapidly these days, and I wanted a little room to grow.
 unflattering boxy unisex tee, size M
There are a few main differences between a women’s fitted tee and a standard unisex boxy one – the neckline, the sleeve setting, and the side shaping. Because of the desired roominess factor, I decided to leave the third part alone. The following illustrations show the main differences in shaping:
Unisex Tee
 Girly Tee
 Overlapped:
 The compromise:
 That’s not to say that my compromise made a particularly flattering shirt. Trust me, making the sides more fitted would have changed this for the better significantly. But I can always do that later, when I’m sure things will continue to fit me. Right now, I want the belly room.
So, how to make these alterations? First, I went and pinned down the slope of the arm inset, and cut as evenly on both sides as I could:
 pins along my new armhole
 arms off
Then, I cut the sleeves smaller, lining them up the arm holes I’d already cut so that they would fit the holes. Because the new armholes are curved and inset, they’re necessarily larger than the old ones, so in order to use the old sleeves, I’d need to make something of a cap sleeve, cutting on the diagonal. Otherwise, the armhole would bunch up, not very attractive.
 little sleeves
Then, to sew. I lined up the sleeve and armhole, turning the body of the shirt inside out so the “right sides” were together, facing each other, and I was looking at the inside of the body. My serger has a teeny “free arm” that allows me to remove the main sewing table and slip a tube up to the needle to sew. Very useful. Using my serger at a pretty medium setting, I sewed both sleeves on, like so:

There’s still a bit of bunching, but this is a lazy, lounge-around shirt, so I didn’t mind so much.

After attaching both sleeves, I decided to widen the collar, by making a serged edge just outside the original collar. I freehanded this, so I don’t actually have good photos. Another freehand job was shortening the sleeves. After trying the shirt on, I thought that the hemmed edge looked a bit frumpy still, so I serged from the armpit around the edge of the sleeves, bringing them a bit closer to the body, and also causing them to ruffle just a bit, for extra cuteness.

In the end, a much more feminine cut, despite leaving the loose and baggy sides (which I’ll really appreciate in upcoming weeks, anyway). A little shabby-chic, which isn’t my usual style, but I think I can pull it off.
By the way, the basic restructuring can be done with a basic straight-stitch machine. Move the sleeves, take in the sides, no problem. Contrary to popular belief, serged stitching doesn’t add extra stretch necessarily. It does keep little annoying frayed edges wrapped up nicely, which is why it gets used for knits/jerseys so much. The serger does a nice job with decorative edging, though. You could zig-zag and trim close on a regular sewing machine for a comparable effect, but it’s not quite the same, and it’s nowhere near as fast to accomplish. The serger is like white lightning!
Ah my serger. Not too expensive (well, $350ish. I think my sense of “expensive,” particularly for tools, is very different than what it used to be), and very effective. I’ve recently learned how to do a blind hem with it! After the disappointment of learning that I could not make the “coverstitch” that you see on the edges of most commercially-hemmed jersey garments (look at the parallel lines at the bottom of your t-shirt) without significantly upgrading my machine or buying a separate unit just for that task, I found the serge-able corollary, and am pretty happy with it. Time to design that long jersey skirt and get going with my autumn sewing (before the quilting bug gets me)!
A Wrap-and-Turn Tutorial
Who could have predicted the popularity of the Nose Cozy? It’s a funny little cone of stockinette, worked using short rows, and perfect to use as a beak, or a false nose, or a witch hat for Barbie…

Well, in my post on the Cozy, I talked a bit about the specifics of wrapping and turning short rows when working in stockinette, as you do for that pattern. But, when I wrote that, I didn’t have the time to go through and make a photo/video tutorial as I would have liked. This, dear readers, is that tutorial. Read on!
A preface: this tutorial is specifically addressing the smoothest way to handle w&t short rows in stockinette, which is not only what you encounter in the Nose Cozy, but also short-row toes/heels when you’re knitting socks, and also the vast majority of short rows in garment shaping (bust “darts” and such). In my experience, the following procedure also works just fine for most lace short-rows where the front side is the “pattern row” and the reverse is mostly purls across. When we start getting into ribbing or garter stitch, however, with purls on the facing side, you may want to seek variants. This is something I hope to tackle in the future, but for now, a tried-and-true approach to stockinette short-rows.
- Following Directions: Work X number of stitches OR until X stitch; wrap and turn (also written w&t).
With short rows, you will have stitches left over on the left when you turn your work around. It may only be one, or it may be most of your row. Keep this in mind.
Now, for the fun part. Once we’ve worked the requisite number of stitches, up to the appropriate place, we’ll be wrapping the following stitch on the left (in the case of the Nose Cozy and most short row toes, the only stitch left on the left). In doing so, we’ll be making a loop that sits snugly around the bottom of the stitch like a choker necklace. This stitch will not actually be knitted or purled, just wrapped and returned to the needle.
 what we’re aiming for – a triangle of stitches, with wraps and turns at each edge
1. Start out by bringing the yarn to the opposite side of the work, between the needles. If you’re on the knit side, that means back to front, if you’re purling, then front to back.
2. Slip the unworked stitch to the righthand needle.
3. Bring the yarn back between the needles (knit side – to the back, purl side – to the front). In our case at the end of the row, we’ll just bring the yarn around to the back.
4. Slip the wrapped stitch back to the left needle.
5. Turn your work around, and continue following your pattern, starting with the next stitch on the left. You will inevitably have some stitches on the left and some on the right, unlike normally when you start a row with an empty needle on the right. This is what makes it a “short row” – you don’t work every stitch in the row, but rather turn at some point before the end, in our example, one stitch early.
So we’ve mastered the “wrap and turn” part, following these directions for both the knit and the purl sides. My mantra? Move yarn first. That way, you don’t get confused about what order things happen in – you just move the yarn first.
Move the yarn, move the stitch. Move the yarn back, move the stitch back. Turn.
ommmmmm….
But now you have all these wrapped stitches, and as you continue on, your pattern will ask you to do something like, “work wrapped stitches with their wraps.” Whatever do they mean?
Permit me to take a step back to talk about this conceptually. If you start knitting at one end of a row and only go partway before you turn around and come back, that’s in essence a short row. But in that scenario, you’ll end up with a big ol’ hole at the place where you turned. This is why w&t was invented; the technique eliminates the hole by creating an extra piece of knitting that joins the end of the shorter row with the knitting that continues beyond it. If we wrap and turn all the necessary stitches, we’ve solved part of the problem. But then we have those wraps, which make gaps and sit like purl bumps on our stitches. We can’t have that! So, to have a more flawless appearance, we work the wraps with their stitches – the extra yarn disappears to the back of the work, and smooths everything over.
Let’s look at this in practice.
On the knit side, you knit up to the wrapped stitch, and then, using your right needle, scoop up the wrap from the bottom. Keeping the wrap on the right needle, insert the right needle knitwise into the wrapped stitch. You’ll want to knit these two pieces together, so first readjust so both pieces are on the left needle. To do this, pull your left needle out of the wrapped stitch, and reinsert it in the same direction (toward the front) into both the wrap and the stitch. You should be in k2tog position, so go ahead and work those two together.  the wrap is the horizontal piece just below the stitch on the left;
I’m picking it up from the bottom, and will work it together with the stitch
On the purl side, it’s a bit trickier. If you pick up the wrap like you did on the knit side, from the side facing you (the purl side, in this case), you’d end up with an unsightly bump on the face of your knitting. No good. So, we need to approach from the other side. Using the right needle, reach around the back of your work (the knit side) and scoop up the purl from the bottom. Bring the needle around toward the front of the work, and insert it purlwise into the wrapped stitch. Again, you’ll probably need to readjust your left needle, so remove it from the stitch, and reinsert it into both pieces, making sure the left needle ends up in the back, in p2tog position. At this point, you can purl those two pieces together.

looking over the back side (knit side) of the work, and scooping up the horizontal wrap from the bottom (further away from the needles)
For our nose cozy pattern, and for short row toes and heels, after picking up a wrapped stitch, you’ll be asked to wrap and turn the next stitch, which results in a double wrap. Picking up and working a double wrap is just like working a single wrap, except, well, you have two pieces to pick up, so you’ll end up working 3 together, either knitwise or purlwise.


a double wrap on the knit side and the purl side
Some techniques benefit greatly from seeing it done – this is one of them. Have a look at the following video to watch the picking up and double-wraps in action:
And there you have it! All the steps needed for making a wrap-and-turn nose cozy. So how does this relate to, say, a sock heel or toe?
Well, if you wanted to start a pair of toe-up socks with a short-row toe, you’d start off by provisionally casting on half the number of stitches you hope for in the final foot (we’re assuming here that you’re making a basic sock where the foot and the ankle have the same number of stitches, not compensating for any sort of stitch pattern. If you are compensating for a stitch pattern, base your stitch number here on stitches/in in stockinette, not in pattern). As an example, we’ll imagine a 60-stitch sock (sock yarn, size 1 needles, should make something like a women’s medium sock). You’d make a provisional cast on of 30 stitches, and my preferred method is the crochet cast on, but you could even do Judy’s magic cast on or a Turkish cast on, and leave the other stitches on another needle…I just prefer not to have that extra needle floating around.
Using those 30 stitches, you’ll work exactly as above. So, in this case, knit across 29, w&t. Purl 28, w&t. Knit 27, w&t…you get the picture. Do this until you have a small number of stitches unwrapped in the center – 10 or so – and then proceed to step two, the picking up and double-wrapping. Once you’ve gotten through all of the stitches, up and down, you’ll have a little toe, and you’re ready to join in the round, unpicking your crocheted cast on or using the other half of Judy’s Magic or the Turkish cast on.
Simple as that!
Knitting with Beads – a tutorial
For all of you lace knitters out there, there may come a day when the addition of beads is desirable, if not absolutely necessary to make you happy, to fulfill your sparkly knitting dreams. And once you start looking, you’ll see that you have a number of options out there on how to achieve this effect.
1) the Pre-Strung approach
One option is to start off by threading all of your beads onto your yarn before you start a project, and when you approach the stitch to knit, you slide a bead up between the needles and onto the piece of working yarn you’ll use to work the stitch.
 Beading needles are made of thin, twisted wire, and are about 3″ long
 First thread the yarn onto the needle, then the beads go on.
 when you get to a stitch that requires a bead, slide a bead up between the needles on the working yarn
 Here, the beads are sitting on YOs, adjacent to k2togs…
 …and when they’re knitted with YOs atop them on the purl side, they float delicately on a single strand.
Advantages: In double-sided lace patterns (that is, where you’re making YOs on both sides of the work, instead of purling straight across the back), this will allow the beads to float on a single strand of yarn, for a very delicate, beautiful effect. Some patterns really need this to shine. Also, your beads are all strung, so you don’t have to worry about loading them in as you go, spilling them all over the place when you’re trying to knit distractedly (I’m sure that every beader has their own story of a spilled-bead catastrophe). Also, unlike the following techniques, if you have to rip any of your knitting back, your beads stay put instead of cascading around the room. A distinct advantage.
Disadvantages: First, you need to take the time to thread all the beads on. Realistically, this could be upwards of 1000 beads, depending on your project. For reference, the Aeolian Shawl uses 850 beads for the small version and 2250 for the larger, and it doesn’t use beads particularly densely. Then, you need to keep these beads orderly on the yarn. For more reference, size 6 seed beads (largish, best for sock-weight knitting) string about 8 beads to an inch. You do the math – that’s 3 yards of beads for something like the small Aeolian, and almost 8 yards of beads for the larger. (note, the Aeolian does not use this technique for incorporating beads – the numbers presented here are for perspective alone) Not only do you need to keep these strung beads orderly, but you need to be able to pull the working yarn through them. That means that every inch of yarn you knit could be traveling through 8 yards (24 feet! 288 inches!) of beads, which, as they’re made of glass, might snag, shred, or otherwise sully your yarn. I’m presenting the worst-case scenario, but it’s not an unrealistic one.
A neutral point on pre-strung beads: you’ll find that this technique makes the bead sit on half of the knitted stitch, on a diagonal, and with a tendency to fall either to the front of the work or the back. As previously mentioned in the Advantages, this can be a desired effect, leading to ethereally floating beads, but in other patterns can be undesirable, particularly if you’d prefer your beads to sit solidly on both legs of a stitch and stay evenly-placed between the front and back of the work.
 Here, I’ve placed beads on regular knit stitches…
 …and you’ll see how they naturally fall unevenly. This is just how it worked out, I didn’t force them to do that.
 You can, of course, straighten them out, but you’ll see that they can flop right back.
So, after considering this option, you may be interested in a different method of beading.
2) the “hook and scoop” approach (aka the Crochet method)
So let’s say you want that bead to sit squarely in the middle of a stitch, and you don’t fancy pre-stringing the beads. How the heck do you get the bead onto the stitch if it’s not on the yarn? Answer #1 – tiny crochet hook.
Method: Knit up to the stitch you’d like to place a bead onto. Using a small steel crochet hook, scoop up one bead, then hook that stitch with your small crochet hook and slip it off the left needle, slip the bead over the yarn loop so it sits snugly at the base of the stitch, and return the stitch to the left needle to be worked as normal. (Note: You can insert the crochet hook into the stitch knit-wise or purl-wise without any difference, just don’t twist the stitch; when you return the stitch to the left needle, insert the left needle into the front of the stitch, i.e. in front of the left leg, behind the right leg.)
Photos, followed by a YouTube video of the process in action:
 first, scoop the bead
 then, hook the stitch…
 …slip the stitch off the left needle, pull the bead over…
 …and return the stitch to the left needle, making sure it’s not twisted (right leg in front is correct).
 Then, knit the beaded stitch…
(my previous stitch is a YO, which is why the yarn’s coming from the front)
 …to get a result like this!
And in live action:
Nota bene: If your pattern calls for you to place a bead on a decrease stitch, you may have to place the bead on an unworked stitch that’s one or two stitches away from the gap in the needles (if you want the bead to show on top, it needs to sit on whatever stitch of the decrease ends up on top). For example, to work a k3tog, you’ll want the bead on the third stitch in, so slip two stitches, place the bead on the third stitch, slip the two slipped stitches back, then work your k3tog. For a s2kp, the middle stitch (second one in) ends up on top, so slip one, place the bead, slip back.
Reference Frame: Where do I place my bead for this decrease?
(note, these are all on the knit side, without their purly counterparts, for good reason. Beads will naturally fall to the knit side of a decrease stitch)place bead on 1st stitch: ssk; skp (a.k.a. sl1, k1, psso) , sk2p (a.k.a. sl1 k2tog psso); k2tog tbl
(essentially, those decreases where you slip the first stitch, which eventually gets passed over the others, or where you are are working multiple stitches through the back loop)place bead on 2nd stitch: k2tog; s2kp (centered double decrease)
place bead on 3rd stitch: k3tog
So you’ve figured out where to place the bead, and knowing is half the battle. But sometimes we run into problems. For example, when I say tiny crochet hook, I mean teeny tiny. Size 10 is the absolute largest I’d go, and it works ok for size 6 seed beads, but is too big for my 8s or 10s. Size 14 is better in terms of the beads, and should be grand if you’re using a tightly-spun laceweight or cobweb yarn, but might cause problems grabbing hold of the whole strand if you’re using something thicker or fuzzier. One suggestion I have is, particularly if you’re using larger beads, to try a Knit Picker. It’s a teeny-tiny latchhook, and after you put the yarn into the hook you flip the little gate, so your yarn gets locked in place while pulling the bead over. My Knit Picker is too large to fit in size 6 beads, but if you’re using fat yarn and pony beads, you may have luck.
 an assortment of tools (including an improvised teeny crochet hook for size 8 beads)
notice that for real seed beads, you’re going to have a hard time using a hook.
Another problem you may encounter is that although it may be easy enough to get your hook into the bead, getting the hook and the doubled-over yarn through the bead’s orifice might just not be happening. You might try a smaller crochet hook, or using a length of dental floss or tigertail (coated metal thread used for beading). These last two techniques are in essence the same as the Flosser technique, so I’ll hold off on explaining them here, as I touch on them a bit later.
 the same process with the tiny hook
note, the bead is already on the hook, but my thumb is obscuring it in this photo
 pulling the stitch through the bead
 color aside, have a look at the different effects using different sized beads on laceweight
Other problems to this method are that it’s laborious and potentially messy, as you’ve got an open container of beads that you’re regularly fishing one out of with a tiny hook. It doesn’t take much imagination to see where this can both be exhausting (you mean I need to be able to SEE where the hole in the bead is?) and a recipe for disaster, especially in a house with cats, small children, or strong breezes.
So this is where I suggest solution 3. I dare say it’s brilliant, and I wish I could take credit for it myself, but someone out there certainly came up with this first. I can only hope to spread the knowledge around.
3) the Flosser method
Method: Go to your local health and beauty aisle, and find a package of 3-in-1 flossers. Oral B calls it Super Floss; it’s got a long, slightly stiff flossy part, a spongy, thick part in the middle, and a shorter, stiffer threader. $3.50 got me a 50-pack of generic flossers (in mint flavor – yum!) from CVS. Thread one bead onto the floss, slip it all the way to the end of the long flossy part, and tie it on securely (to prevent other beads from slipping off this end). Thread more beads on from the stiff end, as many as you like, so long as they all fit on the long flossy bit and the spongy bit. The spongy part will compress where the beads are, but expand where they aren’t, keeping them safely in place and not all around the kitchen table. all set up and ready to go
 look how I can shamelessly taunt the cat, and the beads don’t fall off!
Then, when you need to place a bead, thread the stiff end through your stitch. Slide a bead up off of the sponge toward the tip, and when it’s about an inch away from your stitch, thread the stiff part through the bead, headed toward the spongy part. Slip the stitch off the left needle, pull the bead down over the stitch, replace the stitch, and remove the floss.
Again, photos, with video following:
 floss goes in
 double back and bring a bead up
 slip the bead over the end
 slide the bead onto the stitch
 replace the stitch onto the left needle to be worked
And, in living color:
A similar effect can be reached using plain (unwaxed!) dental floss or beading wire/tigertail, without the distinct advantage of being able to fearlessly store many beads at the ready. Personally, I find regular dental floss to be a bit too limp, and tigertail too thick with its plastic coating, whereas the stiffness of the flossers is just right for my liking. Your mileage may vary, as they say.
Give it a try and let me know what you think!
Nose Cozy
I’m not a witch, I’m not a witch! This isn’t my nose, it’s a false one!


This was a fun little knit to compensate for my chilly house. Can be worked in any yarn at any gauge, I used Mountain Colors Worsted on size 4s for a dense fabric, Cascade 220 would be another great choice, but really, the sky’s the limit!

Directions:
CO 22 sts (or enough to get 3.5″ in your gauge).
Work short rows as follows:
Knit across to last stitch (k21), wrap and turn (see below for notes on wrapping and turning).
Purl across to last stitch (p20), wrap and turn.
Knit across until last stitch before wrapped stitch (k19), wrap and turn.
Purl across until last stitch before wrapped stitch (p18), wrap and turn.
Continue in this manner, working until 1 before the wrapped stitch, and wrap and turn until there is only 1 unwrapped stitch remaining.
The second half:
On next row, work unwrapped stitch, and at the wrapped stitch, pick up the wrap, and work it together with the stitch it wraps. Wrap the next stitch and turn.
Work across until next wrapped stitch, pick up the wrap, work it together with the stitch, wrap and turn.
For all following wrapped stitches, you’ll be picking up 2 wraps and working them together. Continue in this manner until you work through all the stitches. Bind off all stitches, tie on cords to hold your nose cozy on, and you’re all set!
On Wrapping and Turning:
[Full wrap-and-turn tutorial here]
My experience has told me that the best way to do wrap-and-turn short rows is to work up to the stitch that needs wrapping, move the yarn between the needles (frontward if you’ve been knitting, backward if you’ve been purling), slip the stitch to the right needle, and turn the work. When you turn the work around, put the yarn in “working” position – to the front for purling, to the back for knitting – and slip the stitch from left to right again. This wraps the stitch, and you can see the wrap sitting along the bottom of the stitch’s shank. Notice that the stitch hasn’t been worked, just wrapped.
Some of you may have found instructions that change the order of events depending on which side of the work you’re on, but trust me on this one – wrap, slip, turn, slip. It makes a nice, smooth fabric with no holes.
When working the second half of your short rows, you’ll be picking up the wraps. On the first stitch of each side, you’ll pick up just one wrap, but then you’ll wrap and turn again, leading to double wraps which both need to be picked up and worked with that stitch. When you’re working a wrap on the knit side, pick up the wrap from the front of the fabric from below the wrap. I then put the stitch on the right needle along with the wrap (knit-wise), and pull both wrap and stitch onto my right needle entirely. This allows me to put the left needle into both loops securely (think of the last steps of ssk), and makes knitting them together much simpler.
On the purl side, you’ll want to pick up your wraps from the back of the fabric, from the bottom of the wrap. This can feel awkward, especially when you’re picking up a double-wrap, but persevere! I find Addi Lace and Knitpicks needles, with their sharp tips, to come in handy in these situations. Similarly to the knit side, once I pick up the wrap, I also pick up the stitch to be worked, but I move both pieces to the right needle and re-insert the left before moving on – it makes the execution of the stitch considerably easier.
Next nose cozy I make, I’ll take pictures to make this crystal clear, because my favorite photo tutorial has vanished from teh interwebz! O noes! [Edit: see here for photo tutorial!]
Enjoy your nose cozy in good health!
A finished sweater. At long last.
The projects continue! Jonathan’s sweater is done, and thank goodness. 
When we left off last, I was waiting on the 3rd shipment of yarn, in the correct dye lot. It arrived in good time, and I picked back up to work – lengthening the body of the sweater a bit, and re-starting the yoke. Just so you can share in the pain, here are the pieces worked with the wrong dye lot:

No, that’s not “just a shadow or a wrinkle”…boo hoo…
This sweater has been a learning experience, let me tell you. Buy enough of the right dye lot, and DO THE MATH! You might remember my Adventures in Pooling, wherein I extolled the pleasures of doing knitting math. Well, dear friends, I’m actually a little bit afraid of math. And occasionally, I let myself think that things will figure themselves out just fine without my intervention. Knitting denial, let’s call it. So when it came time to turn the shoulders of this bad boy (much like turning a toe-up Widdershins-esque heel – the coolest no-pick-up flap heel ever), I just had at. At each end of flap row, I’d work 2 together with the held stitches along the front and back, then turn, slip the first stitch, and work across the flap again (if you’ve done Widdershins, Interlocking Leaves, or a similar toe-up flap heel, this should make sense to you).
The problem is, knit stitches are not squares, or in this case, 2:1 rectangles. These particular knit stitches are 3:4 (6 stitches per inch, 8 rows per inch). To make the shoulders, you need to line up rows with stitches, so going 1:1 or 1:2 will both cause problems – you need to work at a rate of 3:4. Below, see what happens when you do what I did, and unthinkingly (DENIAL!) work at a rate of 2 rows per 1 stitch:

Pucker up! The yoke becomes bulky and puckery, and Jonathan (the sweetheart) tried to minimize the effect by puffing up his chest and shoulders as much as possible when trying it on, but alas, no dice. Learning experience, right?
So, I ripped back to the shoulder turn point, and tried again. Work to the end of the flap, ssk. Turn, p2togbl, work to end of flap, p2tog. Turn, k2tog, work to end of flap, ssk. Turn, slip 1, work to end of flap, p2tog. Turn, sl1, repeat. When you work a decrease at the end of the flap and immediately after at the beginning (after the turn), that’s 1:1 (or 2:2). When you slip the first stitch of the flap after working a decrease before it, that’s 1:2. Alternate these, and you get 3:4, which is what we need. Phew.
How many times have I ripped parts of this sweater back? Many. But, it’s done!

(let’s not talk about the way the sleeves and body bias right…we’re ignoring that one…)
Colorwork and Computers
The long-awaited Colorwork and Computers post (promised a month ago, but then life got in the way).
If you, like me, are too cheap to spring for KnitPro or other knitting-specific programs, never fear, you can still go far with the programs you may already have. Marnie MacLean has some very handy tutorials on how to use MS Excel to make colorwork charts and also for creating multi-sized patterns. But, let me explain what it was I really wanted to do, and how it wouldn’t work.
I wanted to make a fair-isle pattern, using 4 or 5 colors, and with only a handful of pattern motifs, but with different variations of where the colors appear. Simple enough. Something like this:
In this case, this is one of the many pattern variations from my Eric’s Hat (ravelry project page – login required), seen here in it’s uneven glory:
You’ll notice this pattern in the lower center there. I wanted to document it, and play with some of the other possible permutations of the design by shuffling the colors around. Marnie’s technique was great for completely altering the color palette, but what if I wanted to rearrange the 4 colors in a different order?


Two variant color schemes
No, you don’t have to resort to Photoshop layers and selective replace (I tried it, and it’s messy. Keep away). Instead, you just need to utilize two features of Excel that come standard – the Scrapbook function (a more intense clipboard), and the color swatch option.
So following Marnie’s advice, we make a spreadsheet, set the blocks nearly square, and make our pattern. For this, we only need to color by hand a small bit, because it’s a repeating pattern.

To color, we use the fill color option on the formatting toolbar. Make note of which colors you use to fill in, as we’ll be fiddling with them later. 
Fill in your design with your colors of choice, and using Microsoft’s Scrapbook option (Tools>Scrapbook), copy the pattern piece (select, drag and drop). Then, with that color pallet saved, you can go into Excel’s color settings and start getting groovy.
Go to Excel>Preferences>Color, and find one of the colors you used for your design (they won’t move around, so click on the same box as when coloring in). Click “Modify.”
Now, if you want to use these same 4 colors in a different order later, it will help if you save the color to the small bar on the bottom here. So, click the color from the wide bar at the top, and drag down into one of the smaller cubes on the bottom of the “Modify” menu. It’s now stored. Before doing anything else, click “OK” and do this for all your 4 (or more) colors – saving them to the bottom menu via “Modify”.

Once you’ve done this, the rest is cake. In the Modify screen, just click the color on the bottom that you’d like to trade out for. Green goes to white, blue goes to orange, and so on. Once you’re all swapped, have a look at your image. Your colors should be all different.
Copy this to your Scrapbook, and do it all again.

When you’ve collected a scrapbook full of clips, you can start using them to build your pattern.

Voila. For many instances of fair isle, you’ll probably be content using the “Modify color” feature to swap colors around, so you can see your motif in shades of blue, or green, or red. The same concepts apply, you just don’t need to save the color to the bar at the bottom.
BTW: Having used both Excel and Numbers (Mac), and really wanting the Numbers to work, I found that it just doesn’t have the same functionality. Microsoft has us this time…
And one last note about fair isle theory, while we’re talking colors. It’s not just the hue that makes colors stand out against one another; it’s density as well. A bright fuchsia might look nothing like that lime green in “color”, but in fair isle they’re just not going to make a great contrast. The great Eunny Jang once mentioned using a black and white photocopier on your design – if you desaturate the pattern , by making it black and white, and the contrast still shows, you’re golden. If the b&w version looks muddy, you’re in trouble.
With computers, though, this becomes even simpler. Why go through the trouble of knitting a swatch of these colors and finding a copier, when you can just as easily print your charts out in grayscale? Or, even better, just desaturate the image using a graphics program. Like this:

Look at how little contrast remains between the green and orange! For this, I just copied the cells into Preview, and in the “adjust color” tool, took the Saturation slider all the way to the left, down to zero.
When desaturating the picture of the original, we see that the contrast is a little better, but not much:

For reference, the band is orange, the dark stitches blue, and the middle green – they start to blend in.
Hope this gives some food for thought when playing with colors and computers! There’s a lot you can do!
Pooling for pleasure!
Once upon a time, I fell in love with a skein of yarn. We were in Montréal, poking around the lovely Effiloché, and I wanted to take something home. Really, I wanted to take many somethings home, but when I saw the Handmaiden Sea Silk, I knew my budget would only allow for one. At $43 CAD a pop, this was a real splurge, but how could I resist?

Please note, this is not my skein of yarn. I *really* had to pee, and when the girl asked me in French if I wanted it wound, I thought she was asking if I wanted a bag, and consented. Subsequently, my glorious skein of yarn looked more like this:

This was my first hint of the impending problem. While in the skein this looked like an autumn sunrise, golden coppers blending seamlessly through a bright chartreuse into deep cobalt, wound up into a ball it was orange and blue – a quintessential no-no.
And, as I started to knit it, it was clear that it was going to make a big orange mess. So sad! I went so far as to wind the whole thing back into a skein with the intent of trying to destash it, when I had a brainstorm.
Somewhere in my Ravelry ramblings, I’d stumbled across Wenat, who makes magnificent scarves out of self-striping yarn. Her blog explains how, by finding how much yarn is in a pattern repeat of color, you can make your own intentionally pooled scarf, comme ça:

Wow, right? I know! So, I set about trying to find a stitch motif that would both suit the yarn, and cause the right pooling. This was easier said than done. My first pattern was one that had an extra YO on the knit row, compensated by an extra p2tog on the purl side. No good – the same amount of yarn needs to be expended on each side. I fiddled with needle sizes, stitch patterns, and more, until I found the design I wanted, from the best lace knitting book ever, Susanna E Lewis’ “Knitting Lace”. I picked pattern #54, and finally, today, figured it out.
What I eventually did was thread a needle with a fine piece of yarn, and insert a piece of that yarn at the midpoints of the blue and the orange sections. Then, I made a provisional crochet cast on, and starting at the middle of orange and going to the middle of blue, I counted how many stitches I used before hitting the next thread marker. 36 was the number (on size 6 needles, if anyone’s following along). Because my pattern was a multiple of 9, I ended up altering it a bit so it was a multiple of 10, and added a 3-stitch garter edging to each side.
Then, I worked the pattern, making sure that the end of the row was hitting at the midpoint of the next color – at the thread marker. I soon discovered that my purl rows were eating up a *lot* more yarn than my knit ones, and tried a few tricks to compensate. Eventually I dropped down to a size 4 needle on the purl side (hurray for interchangeable tips – I could just swap one out), and purling tightly with the 4 I was able to get the colors to line up just about perfectly. Ready for the results so far?
Drumroll, please….


Awesome, right?
I’m so in love with this yarn again, and I’m so happy that I’m able to indulge in variegated yarns without fearing how they’re going to pool, flash, or speckle! Hurrah!
Ravelry Project Page (login no longer required!)


