Posts filed under ‘knitting’
The year of knitting from my head
This year I’ve decided to do the majority of my knitting from my own head, without using someone else’s published pattern as a starting point. A good friend heard me proclaim this, and thought I was crazy, what with a dissertation to write and an unfortunate dearth of free time in my life, so asked me to explain my reasoning. She raises some good points, but I still think the pros outweigh the cons. Allow me to explain to you all…
Back when I re-learned how to knit in 2003, I didn’t have access to a lot of knitting patterns. I had a couple of booklets from big-box stores, and a few basic patterns I’d bought from yarn stores. So, I knitted a lot of very basic things, and used my knowledge of garment construction (from sewing and crochet) and color relationships to improvise things. The result was, at first, some very basic, often wonky or rectangular things. Eventually I discovered Knitty and some good knitting blogs and pattern repositories, and my eyes were opened. I started cobbling together different parts of patterns to make new and interesting projects. I started charting out designs in cables or colorwork and branch out in the shapes and kinds of things I knitted. Some patterns I altered on purpose, some by happy accident, and some I stayed true to, down to the smallest detail. I invented a fair number of things from scratch, and had to scrap a fair number of them, like the mesh yoga mat bag that was better suited to holding a dozen soccer balls, or the cozy alpaca shawl with dyelot issues that blocked out larger than a bedspread. But some were wonderful, like the iPod holder for wearing under my coat, or my first fair-isle hat, or the satchel with an endless knot worked in cables (which was given away with nary a photo taken). It was this kind of fearless and inventive knitting that got me a job at Stitch House, and which got my heart pumping.


Then, in 2007, after months on a wait list (get offa my lawn!), I joined Ravelry. And it was awesome. But it also changed the way I knit. All of a sudden, patterns were not just something you could find on one webzine or in a shop. Patterns were fodder for conversation. People would recognize the patterns I knitted, and would complement me on them when they recognized them. I found that people at the yarn shop were more likely to swoon over a nice project that they recognized than one that they didn’t know. And, as a salesperson, it was in my best interest to knit things that customers could find online or in the store and buy yarn for. Saying, “Oh, I’m making it up as I go along” not only sounded strange, but it also didn’t sell any yarn. Soon, I was knitting almost exclusively from other people’s patterns, and preferring “hot” patterns over obscure ones. And it made me a little uneasy. One fantastic thing about other people’s patterns is that you learn how someone else would tackle a problem. And sometimes it’s fun to figure out what they’re doing, and make a judgement call: do I want to do it their way, or do I have a different idea I like better? But if the pattern is clearly-written and well-edited, and you don’t intend to do anything crazy like restructure the shaping or add in many new elements, often following a pattern requires very minimal mental acrobatics. And after a while, I started to miss those acrobatics.
So this year, I’m knitting from my head. I no longer have the pressure from working at a yarn shop, and, like the year in Russia that ignited the spark of my most creative early knitting, I’m knitting to keep sane and happy more than to show off my pretties to others. I’m not saying that I won’t knit anything from a pattern this year, because I’m happy to be carried away by something beautiful. There are a lot of gorgeous patterns in my queue, and I’ll be happy to work on some of them. But I’ve also got a lot of gorgeous ideas in my head. Knitting from my head means taking those ideas, and instead of going to Ravelry to find some close approximation that someone else figured out, it means going to my sketchbook and figuring out what my vision for the project actually is. It means swatching, and calculating, and trial and error. It means stash-down, it means cold-sheep, because I can tailor my projects to my yarn stash and not the other way around. And it means taking more control over my spare time, and using it to feel awesome about myself and the things I do. When I knit from my own head, I’m allowing my own interests to shine, and embracing the puzzles, the tricks, the difficulties. And the beauty in figuring out the solutions to those problems. And the pride of successfully having untangled the Gordian knot.
And, maybe I’ll make some lovely patterns to publish and share with all of you in the process!
Whimsy
With the days getting ever so slightly longer, I’ve been feeling phenomenal lately. My academic writing’s been going well, and I’ve been baking up a storm (nothing adventurous, but my family never says no to a batch of tried-and-true cookies). I’ve bought seeds to grow a garden! Just when it couldn’t get much better, I had a brilliant idea that would make my life oodles better: redesigning my winter hat.
You see, my warm winter hat was a gift a few years ago – a white wool “Kaldi” hat from 66˚North, with fuzzy lining and earflaps. It’s a lovely hat, but has a few problems. It’s always been a little snug on top, and the peak of the crown is sort of pointy, making an egghead shape. And, the seams are on the outside. Maybe it’s “traditional”, and it was a look that was super trendy some years ago, but I never liked outside seams (and don’t get me started on inside-out fair-isle).

66N Kaldi Arctic Hat
So the other night I took my stitch ripper and performed some fuzzy-hat surgery. I undid all the seams on top and restitched them by hand with a narrower seam allowance, making the hat roomier and bringing the seams to the inside and out of sight. I also changed the crown shaping a bit to fit my head and eliminate the peak. I changed the way the front flap folded up a bit, making it rounder and smaller. And I took off the designer label, just because.

Hat with new seams
And then, I got an idea. I’ve been thinking for some time of decorating the hat, because a large white hat is nice, but couldn’t it be nicer? Embroidery? A dye job? Knitting a cover for the whole thing? As I was staring in the mirror, it came to me. Cat ears. CAT EARS! I grabbed my yarn and knitting needles and set to work.
These ears are the same as the ears of Hibou the Owl, just bigger and felted. I cast on 60 sts, and worked 3 double-decreases evenly spaced every other round until all stitches were used. Then I felted by hand a bit, but eventually just tossed them into the washer and dryer with my other laundry. A little shaping, a little stitching, and then, voilà, ears!


Ready for the cold!
Socks on the go
So, I like knitting socks an awful lot. But my knitting time is not so copious these days, so I make sure to always have a project with me on the go so I can make use of those precious oft-wasted minutes waiting in lines, sitting on buses, or just waiting for my gosh-darn computer to finish loading whatever it is that’s taking so long. I find that knitting is especially useful in helping me avoid the black hole of internet distraction while writing my thesis. If I need a break to decompress or gather my thoughts, I knit a few stitches and let my brain settle, rather than checking Facebook or Ravelry and suddenly finding that a half an hour has mysteriously slipped out of my grasp.
And, as I’ve mentioned before, I really like knitting socks on double-pointed needles (DPNs). But traveling with DPNs can be tricky. Knitters worry about the needles slipping out of the work, or getting crunched by the other things in your bag, and for good reason! I’m fearless (and really good at picking up lost stitches), so this doesn’t stop me, but I can see why others are less eager to throw a sock with its 5 toothpick-needles into a backpack and pull it out on the bus.
So what’s the solution? This is my roundup of options for keeping your socks safe between bouts of knitting in public, including my own prototype DPN sock holder (DIY all the way, baby).
First, the solutions you don’t need to buy:
Wrapping your needles up in the yarn. This has long been my preferred method of transportation. You fold your sock up, squish the knitting to the middle, and wrap one end with the working yarn. Then, you wrap the other end. Then, you do a little figure 8 back and forth, and secure by catching the working yarn between the needles on one end. Voila, you’re good enough to go.
Rubber bands. This is too much effort for not enough class for me, but you can put rubber bands of any size (actually, I recommend fabric-covered hair elastics, so they don’t snag your yarn) on the ends of your needles, bundling them all together. Be careful not to make them too tight on small needles, though, or you could warp or even snap the needles.
Solutions from your LYS, or online:

Clover needle holders. These little plastic coils work like the rubber bands, except they’re cuter, and will set you back $5-7 a package. They come in two sizes, and the size you choose will depend on how big your needles are and how many you’re bundling together. I actually think the flexibility of the rubber band wins in this case.

Rock Your Socks by NeuroticNeedles on Etsy
Rock Your Socks holders. This is available on Etsy from seller NeuroticNeedles, and I’ve seen similar (or the same) in a yarn shop locally. They’re two plastic caps that fit over your needle tips, with an elastic that connects them and holds them together. Sometimes they have cute little charms in the middle. It’s a nice concept, and will stop dropped stitches or missing needles and accidentally poking through your bag, but if you shove your laptop on top of your sock, this isn’t going to offer any protection. But, a good concept, worth trying out. $6-8 on Etsy, depending on how fancy the charms are.

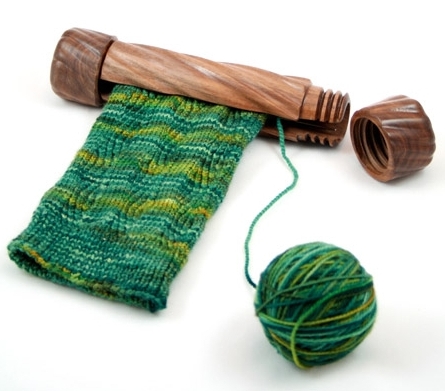
Knitpicks Sock Knitting Needle Holders. I’ve personally used these, and liked them. They are a pair of paperboard tubes that sit snugly inside one another, with a slit that allows your sock knitting to come out the middle. You can store empty needles in them too, by just rotating the tubes so that the slit is closed. The way they’re designed means they fit a wide range of needle lengths, and you don’t have to worry about elastics snapping. But, the quality is chintsy. They’re paper, after all. After using them a short time, the layers started to come apart. I taped them back up, but then my toddler found them, and that was the end of that. Advantages are the price ($5 for two sets of tubes). I’ve only seen these on Knitpicks.com, and I’m still boycotting Knitpicks because of their unprofessional security and customer service practices. But they’re an affordable product and do the trick for light use.
Tin holder – discontinued? Way back in 2006, the Yarn Harlot blogged about a tin needle holder that she’d gotten, that originated from Woolworks, Ltd. I’ve contacted them, and received no reply, nor does their website mention awesome needle holders, so I have to assume that they’re no longer being produced. Too bad, because they looked great.
OMG gorgeous – http://www.knitzi.com
Knitzi. This is the gold standard of sock knitting needle holders, and I want one so badly. They’re hand-carved wooden tubular cases to do essentially the same thing as the Knitpicks case, except gloriously. Instead of two nested tubes, there is one tube with a threaded cap. Because of this, they come in a few different sizes. Unfortunately for me, this makes my life trickier, because I have a few different lengths of needles. I’d rather get the smaller, 5″ one, to keep weight and bulk down, but I sometimes knit with 6″ needles. Dilemma. It’s okay, the beautiful “Flow” case in walnut above is $109. Regular Knitzis come in sizes ranging from 4″-8″, are in the $30-40 range, and are custom made, so they have a greater turnaround time, but only a couple of weeks. Not exactly instant gratification, but we’re knitters, we’re not in this for instant gratification. Covet, big time.
So, my own prototype looks like an absolute monstrosity following that thing of beauty, but I’m still pretty proud of it. Meet my 50-cent sock DPN holder:

Yes, that’s a toothbrush case. I got it from the dollar store, 2/$1.
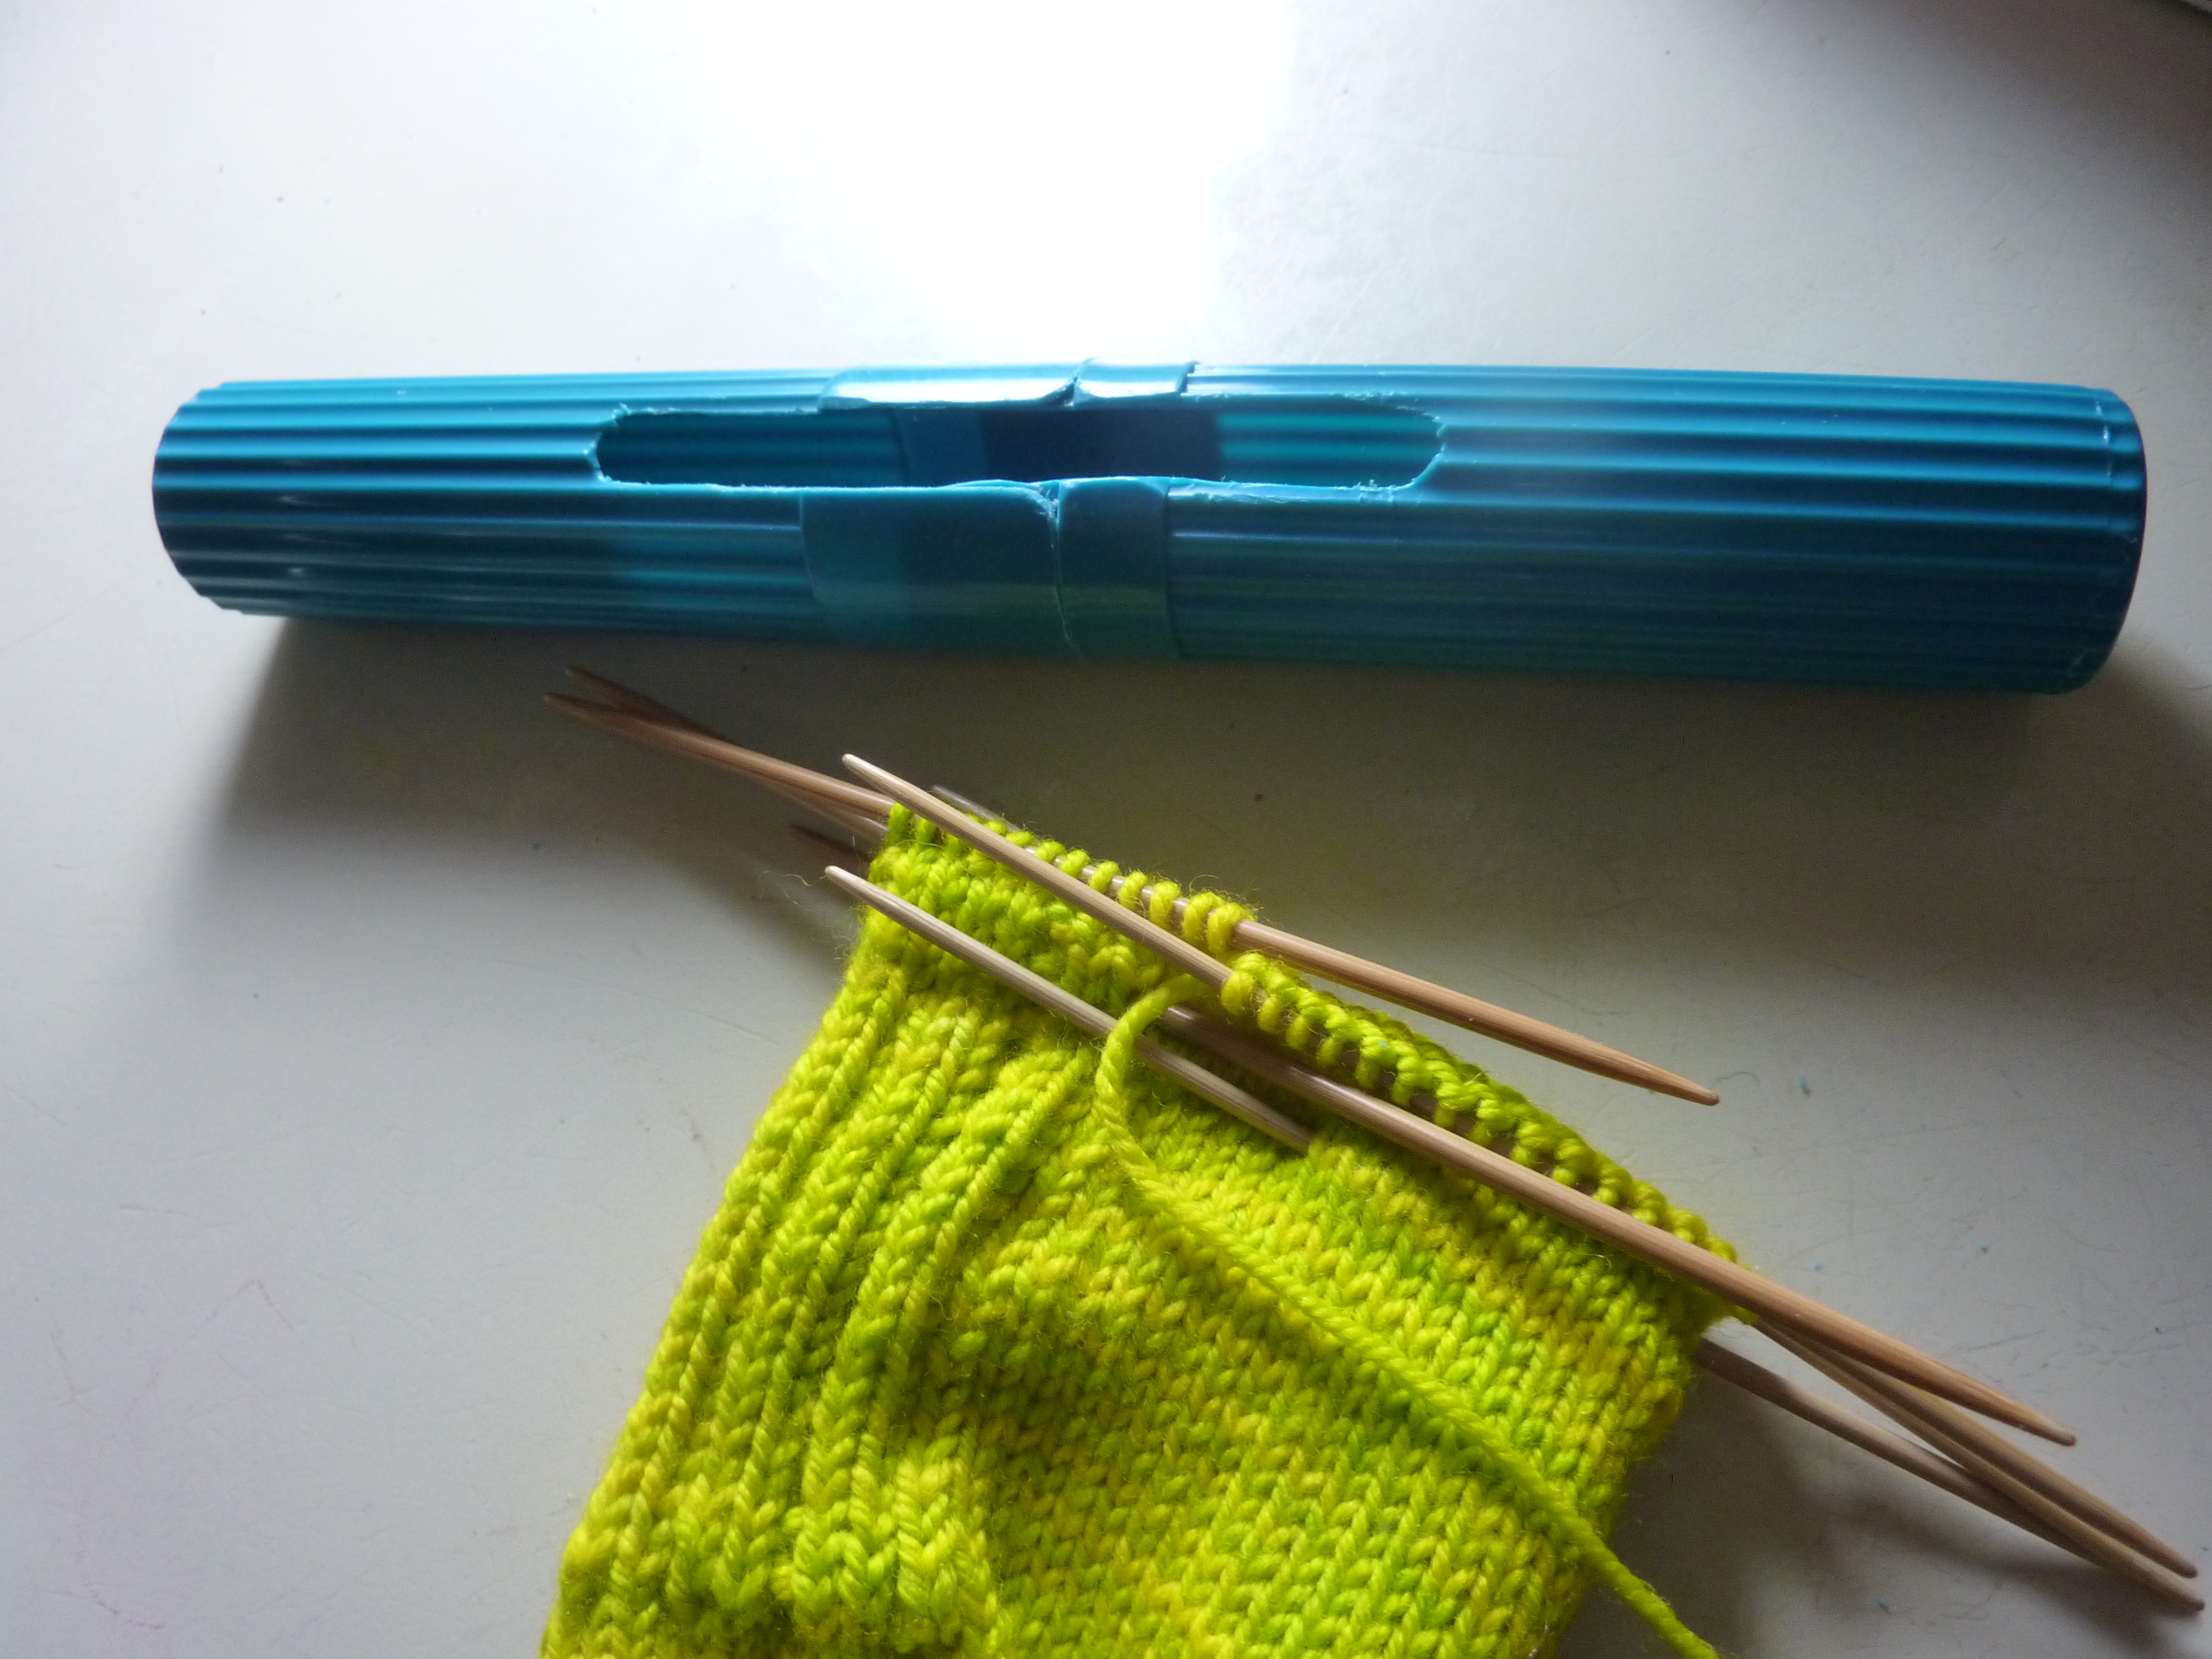
And I cut openings in each half, and smoothed out the edges with an X-acto knife.

And then I threaded fabric-coated elastic through the drainage holes and tied it together at tension, so the two halves would stay connected and have enough pull to keep closed in my bag.
And you know what? It’s great. I’m thinking of some modifications, to drop some hot glue in those holes to prevent extra needles from slipping out, and maybe finding a slightly better elastic. But it’s perfect. The hardest part was finding the toothbrush case, because CVS didn’t have this kind, just the over-the-head type.
Anyone else have stories of successful sock knitting hacks?
Best Friends
New Year, new post! Life has been busy, with dissertating and living and all that, but I wanted to show you all what I’ve been working on most recently in the knitting world. Meet Hibou and Étoile, the very best of friends:

Ravelry Project pages: Hibou and Étoile
The inspiration for this charming duo comes from an absolutely adorable YouTube video I stumbled across, of Twinkle Twinkle Little Star. In it, a cheery owl decides to take an adventure up into the sky, to see what that star is really all about. The star and owl exchange friendly glances, and holding hands, go off on a playful frolic through the clouds. Eventually, realizing that they belong to two different worlds, the star and owl regretfully part, but the implication is that their friendship endures. Or something like that.
What is undeniable is how cute it is. And how absolutely intoxicating it is for my toddler, who would watch it 15 times in a row if you let him. So, for the holidays, I decided I’d make a pair of stuffed animals so that he could have his own starry adventures. I’m incredibly proud of how these came out (especially the owl) and I hope that sometime I get around to writing up a detailed pattern, so that others can have adorable owls too. For now, though, I’m happy to share the basics of construction, which can possible help inspire you to try something similar yourself! A lot of people think that stuffed animals are a lot of sewing up…but these are practically seamless. A little fiddly, yes, but almost no sewing involved.
I started off with the star, because it was the most straightforward in my mind. I’ve made knitted stars before, although my last star was started along the outside, with decreases forming sharp lines along the radii, which was something I wanted to avoid in this star.

For Étoile, I started in the center and worked outward, with lifted increases, to try to minimize the overall visual appearance of the increases. I also decided to have the increases fall along the “armpits” of the star, and then work the peaks separately afterward. So, I cast on 5, joined in the round, and increased in 5 places every single round, alternating left- and right-leaning lifted increases.
When the body of the star seemed big enough, I put it on a holder, and then did the same thing again, so I had two pentagons. Then the fun part. Lining up front and back, with the purl sides together, I worked in the round over 1/5 of the star’s front and 1/5 of the star’s back (from “armpit” to “armpit”). Here, I did double decreases at both sides every other round, to make a “seam” look that would actually be seamless. I did the same thing for each of the points, picking up stitches at the corners to avoid gaps (like you would for glove fingers), until there was just 1 point left.

At this point, I wove in the ends that I could, and stuffed the whole thing. Once stuffed, I decided on the placement of facial features, and used a pair of black glossy safety eyes, backed with a small circle of white felt, to make eyes. The mouth and eyebrows were done with black embroidery floss, and not being an embroiderer, I probably didn’t do this the most efficient or effective way. But, to make the large filled areas for both mouth and eyebrows, first I stitched the outline of the shape I wanted to fill, using 2 plies of floss (I don’t have any pictures of this process, as it was done in hiding and in a rush in the nights before Christmas!). I did the outline in split stitch, and fairly small stitches, to be as secure as I could on the loose knitted fabric. Then, I sort of made up a fill stitch – it’s like satin stitch, except that it’s not flat and it doesn’t totally encircle the fabric it’s worked on – it makes figure-8s between the two rows of split stitches, only on the surface of the knitting. I don’t know what it’s called – do you?
Anyhow, I filled in these shapes, then went to work setting in the eyes, so they’d look more naturalistic and less bug-eyed. To do this, I used 2 plies of the yellow yarn (Cascade 220 SW) and a long soft-sculpture needle, and essentially just sewed the fabric just around/behind the eyes to the stuffing beneath it. I secured off as best I could, finished knitting the last point, stuffed the last bit before finishing, and secured off the final end, tucking it back inside the stuffing to finish.

The owl was trickier. I started with the legs, and made two crown-down “hats”, each with 5 increases every other round. When they were big enough, I joined them together in the round, and worked some short rows to fill in the gaps in the front and back. Pretty quickly, I realized that the owl was a lot fatter than I’d planned him to be, so instead of having his wings come straight out from his body, I decided to do “raglan wings” and have the body gradually taper up to the neck. I had to do some tinkering with this, but it paid off. The front and back were worked flat, and then rejoined in the round for the neck. I did some quick decreases followed by some quick increases to make the neck shaping, and then increased in 8 places every other round to make the bottom of the head, worked even a bit, and then decreased in 8 places every other round to make the top of the head. I finished the crown of the head just like a hat, pulling through the small number of remaining stitches.

For the wings, I picked up stitches around the armholes, and worked even about an inch. Then, I did a centered double decrease at the bottom point every other round for a few inches, and then every round until I ran out of stitches. After finishing one wing, I stuffed him and worked on the face features.
The mask was originally going to be made with commercial felt, but I wasn’t happy with the result, so I knitted an 8-shape out of feltable wool (Knitpicks Bare Worsted), and felted it by hand in my kitchen sink. Doing it this way meant I could stop felting as soon as it was the right shape/size, and then I could wet-block it to shape over a ball overnight so it would lie nicely on the face. I sewed it on with a whipstitch.
The beak was made in two triangles, one slightly larger than the other, sewn together, then stuffed with a tiny bit of polyfill and sewn on over the mask.
The ears are little pyramids, with doubled decreases in 3 places every other round, and sewn onto the head using mattress stitch with a little polyfill stuffing inside. To make the eyebrows, I did a bit of applied crochet – single crochet, double crochet, and triple crochet, filling in the space from the eyes to the tips of the ears.
Eyes were the same safety eyes and white felt as the star’s eyes. I set both eyes into the head the same way as I did for the star, using a length of white yarn.
I knitted the other wing, then did a bit of embroidery on the wings using the knitting yarn, quilting some of the stuffing into wingfeathers, and pinching the wing edge so that it puckers like feathers.
Feet are just little lengths of I-cord, sewn on with the leftover ends from the beginnings of the legs.

Hibou!
I hope I have time someday to write this all up in more detail, with elaborations and numbers, but until that day (should it ever come), I hope someone gets inspired to be adventurous and make something adorable!
The Chronicles of Venezia
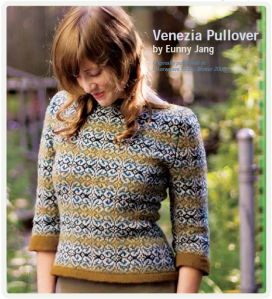
I can’t remember when I first discovered Venezia. I didn’t yet subscribe to Interweave Knits in 2006, but I did fall HARD for Eunny Jang’s designs that winter, when I was living in Russia and knitting to keep sane, so we’ll imagine it was sometime that year, or maybe in my first year of grad school. I added it to my Ravelry queue in August 2008, so maybe it was then. In any case, when I saw this sweater, in its stranded, blue-green glory, I knew it had to be mine.
I eventually bought the pattern, and as I set down to look at the chart, I noticed something interesting, nay, disturbing. The pattern had 9 colors – 5 background shades, but also 4 different “white”s.
 That’s sort of crazy, I thought. Couldn’t this just be done with one white, and a nice range of background colors? Maybe with contrasting edging? So I set to work recoloring the chart, in a more reasonable number of hues. Photoshop is my friend for situations like this:


Armed with this new chart, and yardage estimates, I went to WEBS in pursuit of 2-ply Shetland (this is now December 2010). They had cones of Shetland, but not the 50-gram skeins I was hoping to find. They did have Reynold’s Whiskey, however, which came in close-enough colors to my chart. So, I picked up my colors (I had to order the white online), all 16 skeins of it, and then…sat on it for 2 years.
If you’re a knitter, you’ll understand. First, I needed the right needles, and then, when they arrived, I was in the middle of other projects. And then I was busy, and then it was the summer, and who wants to start a big sweater project in the summer. And then, and then…
Part of it, too, was that I was a little scared. This sweater had a lot of knitting in it. And steeks. And the sizing had to be right. And then I probably would want to tweak things. And really, in 2010, I’d only knitted one or two sweaters, despite having made lots of other pretty things. Sweaters sort of fill their own category. So I waited until the time was right. And apparently, the time was right when I had a squirmy baby in the house and was burnt out on lots of other things in my life. The Venezia was reborn.
By then (August 2012), Reynold’s Whiskey had been discontinued, so I had to cross my fingers that I had enough yarn. Word to the wise, overbuy your yarn. Really, just do it. Luckily, I had plenty of everything, and now have extra enough for a little vest or a sweater for JL, but I’d be so sad if I hadn’t.
The modifications to this sweater were many. First, I lengthened the torso of the sweater, and even then it rides a little short, so I ended up ripping out the original turned hem and adding a long ribbing to bring the edge lower. I mix-and-matched sizes, to make a 38″ hip and a 36″ bust, and changed the increase/decrease rate to go with the new length. It was smooth sailing through the sweater body, and the sleeves too, although I did wait about 6 months between the body and (two-at-a-time magic loop, stranded) sleeves, because it was summer and I was tired of all that colorwork.
Then was the fun part. I decided that there were issues with the construction of the original Venezia – the sleeves were too boxy, and I wouldn’t like a boatneck in scratchy shetland wool, all the way up to my collarbone. So, I wanted to substitute in set-in-sleeves, preferably worked in the round with the body seamlessly to avoid issues lining up the colors in seaming, and to make a V- or scoop-neck. Here’s what I came up with:

So, it’s a little messy, but what you see on the right is the shape of the sleeve cap, in the middle are the armscye decreases, and on the left is the V-neck shaping in black, with the scoop neck shaping and the back-of-neck shaping superimposed in blue. I used some sleeve calculators and a pinch of experience/common sense to figure this out, and then stuck to it pretty faithfully in the knitting. Here’s how it knitted up:

Venezia Left Sleeve – bound off across the top.
You’ll see that the top of the sleeve cap doesn’t reach as high as the body does – at a certain point, you need to bind off the top of the sleeves, and continue with a little steek for the top of the armscye. There is also a steek for the neck in the front, and also a tiny steek for the back neck.

Neck steek on left, armscye steek center.
I then did a strange modified incremental three-needle bind-off over the tops of the shoulders. Here’s what it looked like when I finished knitting, before scissors were introduced:

This is the neck opening, with the front facing down.
This is the least like a sweater that it looked, but soon (the next morning), the scissors came out. I crocheted all the steeks, and soon this happened:


Sweater! (see the scissors in the second photo there?) I have to give some credit to my friend Mira, the first person who ever cut a steek in my presence, for making this moment possible.
It took some experimenting to be happy with the hems and neckline, but eventually, it was done, with a nice corrugated ribbing on the sleeves and neck, inspired by Eunny’s Autumn Rose.

All those color changes meant a whole heck of a lot of loose ends on the inside:

Eep!
I decided that instead of weaving all those ends in, I’d french braid them down the sides. Brilliant! Next time, though, I’ll spit-splice them and not worry about the side seams being a little off, because it’d be pretty near invisible anyway.

Braided arm “seam”
And it was done in time for Rhinebeck! Last year it was too hot for fancy knits, and the year before I was all self-conscious in my Sylvi, but this, this was a Rhinebeck sweater. Perfect.

Playing in the leaves at the Ravelry Meetup, with JL in *his* Rhinebeck sweater.
A Shining Sweater
Last week, Dudley House (Harvard’s Grad Student Center) held a Hitchcock/Kubrick movie night, showing The Lady Vanishes, followed by Doctor Strangelove. I was a bit bummed out to be 300 miles away, and I suggested to Jonathan that we have our own Kubrick night. We popped on our VPN and flipped through Netflix’s offerings (as the days tick down on my free trial), but didn’t find much. What we did find, however, was Room 237, a documentary about different interpretations of Kubrick’s The Shining. As someone who has taught courses on interpreting art, it was a fascinating, if sometimes mindboggling/face-palming experience, and I recommend it highly to anyone who liked The Shining, and who likes crackpot film analysis. It might be too much to take, however, if you’re currently teaching analysis/interpretation to undergrads, so beware. That aside, the film reminded me that I never got around to writing a blog post about an amazing sweater, inspired by The Shining, so here goes…
A year ago, at knitting group, I met Jess. Jess was on a mission. She had never knitted a stitch before, but that was not going to get in the way of her determination to knit her boyfriend a sweater. And not just any sweater, no. This sweater:
 In case you don’t recognize it, this is Danny’s Apollo 11 sweater, from Kubrick’s The Shining. She told me how, even though it was totally goofy, she knew her boyfriend would love it. She just needed some help knitting it. She even had a pattern, although it wasn’t quite right for what she wanted.
Now, if you are a knitter, this story is probably setting off any number of red flags.
#1 – An adult sweater is a big knitting project for anyone, not just a beginner knitter.
#2 – New knitters often have a learning curve, and it usually takes a while before a knitter can produce fabric with an even texture and tension throughout, especially over the amount of knitting required for a man’s sweater.
#3 – This particular sweater is not just a vanilla project – it has seaming, color changes, and embroidery, on top of the more basic ribbing, sizing, and stockinette knitting.
#4 – Haven’t you heard of the “Sweater Curse”? Where giving your boyfriend a handknitted sweater will cause the relationship to self-destruct? Yeah, that.
#5 – The pattern in question was a hand-drawn chart, made for a worsted-weight (relatively fine-knit) sweater. Which is ok, but not quite the chunky sweater Danny is wearing in the picture. I’m pretty sure the pattern she had was this one, where you can see what the end result is. It’s an ok sweater, but it’s not quite right.
And that’s just the beginning. But I listened to Jess’ story, and frankly thought that it was an awesome project. Maybe I’m a sap, but I totally think that goofy sweaters for boyfriends, given with no expectation that they actually get worn, totally defy the drama of the sweater curse. Besides, as I came to discover, Jess is a very methodical person, and her approach to knitting reminded me a lot of my husband’s – slow, steady, determined and perfectionist. I’ve seen this kind of knitter-scientist take on technically challenging projects with great success, even with very minimal experience. So I told Jess I’d help her, and gave her some yarn and needles.
Jess got yarn, found a hat pattern, and started working on learning how to knit. I poked around online, found a basic free chunky raglan sweater pattern, and got to work in Excel to sketch out a chart for the Apollo shuttle that better matched Danny’s sweater, at the gauge of the chunky sweater. Jess did some reconnaissance, took many measurements, and set to work figuring out what size to knit the sweater. Lots of math was done. Lots of swatches made. Jess demanded certainty – that the color be perfect, that the sizing be exact. I offered experience – that one stitch or row’s difference here or there wouldn’t make or break things.
Over the next semester, the knitting group fell apart. Some people graduated, others were busy trying to graduate. I had an infant who didn’t really like hanging out until 10pm at the student cafe. But Jess had a sweater to knit, and was determined, so we kept meeting, and the sweater started to come to life. Sleeves were knit. A back was made. Colors were introduced.
Of course, there was another issue. I was moving away in July. So, as Jess knit away in secret, afraid to tell anyone lest the word get out to her boyfriend accidentally, she was also working against the calendar, trying to learn everything she needed to before her knitting teacher quit town. I last saw Jess in June, right before our moving day, when we went over seaming with the mattress stitch, and doing the final embroidery in black.
And then, in September, I got the photos of the sweater – it lives!
 almost finished!
 All done
 the happy recipient
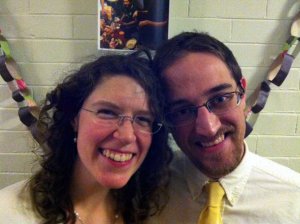 cute couple
So, I might be more invested in this sweater than I ought to be, but I’m super proud of Jess, who went from non-knitter to awesome sweater knitter in about a year’s time. May your sweater blast big, rocket-shaped holes in the sweater curse forevermore.
A love letter to sock needles
Probably my all-time favorite thing to knit is socks. I love their portability, their practicality, and the way that no matter how outrageous your sock yarn is, you can make a very wearable garment from them. Case in point:


Yum, socks. Yum, sock yarn.
But knitting with great yarn is only part of the equation. The needles are a big deal too, and the point of this post is to talk a little bit about my preferences and experience with a variety of sock needles. Hopefully some of you can find this helpful in your own knitting ventures! A note: I’m not affiliated with any of the companies or products I’m about to mention, and anything I own I’ve purchased out of my own interest with my own money.
Here’s my (long) roundup of sock needles!
When I first started knitting socks in 2003 (goodness, that long ago?), I did it with big-ish needles and heavy yarn, because it was less intimidating that way. My LYS, A Stitch Above in Providence (long-gone), turned me on to Brittany needles, which were beautiful pieces of craftsmanship, and so my early socks were knit on size 4 Brittany DPNs.
These needles hold a special place in my memory, and are very functional and aesthetically pleasing. The tips are not too sharp but not too blunt, and the surface is just a tiny bit waxy, which gives a nice resistance to a slippery yarn (although possibly annoying if you’re a tight knitter. I’m not).
So, when I wanted to make “real” socks, I turned again to Brittany DPNs, this time in a size 2. And wouldn’t you know it, very soon in, my DPNs started to break. This is how I learned something fundamental about the composition of knitting needles – grain matters. The Brittany needles are made out of a sustainably-harvested birch, chosen for its tensile strength and stability. But, at a small diameter, the fact that it’s a hardwood with a grain means that it has inherent fault lines and is prone to breakage, particularly in conditions of heat and moisture causing swelling/distortion, and applied pressure. Oops, that sounds quite a bit like my knitting experience. Brittany was amazing about sending a replacement free of charge as soon as I contacted them, and these days they include a 6th needle automatically, because they’re not surprised that they break. For me, I decided there had to be a better option. (For the record, this is also the main reason why I don’t recommend people snag the very affordable KnitPicks sock needle set. I have other beef with KP too, but in this case, it’s a simple problem with small diameter wooden needles, and I suggest you avoid the hassle.)
On a trip to Russia, I picked up some random 2.75mm DPNs, which I used to make my Clessidra socks. They’re possibly Pony or Inox, or something like that, a painted aluminum, and about 7.5″ long. Uncomfortable, but they let me make a hat and some socks, so they served their purpose.
My next sock needles were Susan Bates aluminum needles. I was in a big craft store one summer break, and saw that the set ranged from 000-1, and was pretty cheap. To be fair, they’re not bad needles. They bend, as aluminum does, and the smaller gauge needles seem too flimsy for the job, but they work. My biggest complaint was actually the length. They’re 7″ long, which just feels unwieldy in my hands with an average sock on them. They also sort of hurt my hands Fun (gross) fact – one of the size 1s punctured my calf during a car crash in 2009, while I was knitting these Interlocking Leaves socks on a trip to Quebec! Fun times!
I didn’t really like the Susan Bates needles so much, and by that time, I was working part-time at Stitch House, so I had access, and discount, to other varieties of needles. My next choice were the Clover Takumi DPNs, which came in an appealing 5″ length. These became my go-to, and still are in many ways. They are made out of bamboo, which don’t have the same grainline problems that the Brittanys had, but are still warm to the touch and have a nice friction unlike the metal needles. The length fits perfectly in my hands, long enough for the palm of my hand to have some power, but not too long to be awkward. The slight bend they take is nice, although they can indeed break from time to time. Still, much less often than the wooden ones. I now have the Clovers in size 0-2, and tend to reach for these first for socks.
On a whim, I picked up a set of Lantern Moon Sox Stix, which are beautiful. Sadly, one broke (wood! grain!), but customer service was awesome and sent a new one pronto. They are made of rosewood, and are just a delight to work with. Sharp tips, smooth finish, nice feel, and gorgeous to look at. If I were made of money I’d have lots of these, but probably no smaller than a US 2, because of breakage. And I so seldom knit socks on anything larger than a 2. Alas.
During the Great Rhody Yarn Crawl in 2009 I bought a set of 4″ HiyaHiya steel DPNs in size 0. They were so cute! Unfortunately, I realized that 4″ is just too short for the way I knit with DPNs, and the back end of the needle pokes me in the flesh of my palm. I’ve kept them around for glove fingers, but that’s all they’re good for right now it my book, which is too bad, because they’re adorable and nice needles with a good feeling otherwise.
Then, there was Sock Summit, in 2011, and I got a chance to see and try out some needles I’d only heard about – the Signature stilettos, and the Blackthorn Carbon Fiber needles. Swoon. I really loved the Signatures – the feel, the sharp tip, the warm fuzzies you get from a small American company…but I just could not justify the price tag. At $47 for a set of DPNs, I had to pass. The Blackthorns were interesting, though. Carbon fiber meant lightweight, unbreakable, and still warm to the touch unlike metal. Like a high-tech bamboo. I caved in, and when I got home ordered a set of 5″ size 1s, for $35. I wanted to love these needles, and yet… Two issues. First, there was the squeak factor. Knitting with these needles felt unmistakably like writing on a chalkboard, with the way the needle tips rubbed against each other. Not so nice. And also, I’d often get the uncanny feeling that a sliver of carbon fiber had gotten stuck in my hand. It wasn’t visible, but I’d get these red irritated spots and it felt just like a tiny splinter. So, I moved these along to a new home.
I was delighted, then, to discover the new Knitters’ Pride Karbonz needles – carbon fiber, with nickel tips. I’m really happy with them – they’re tough, and light, and pretty. The only thing that bothers me is that they absolutely don’t flex – which isn’t a fault, but more a realization about what I like in a needle. The rigid straightness of the Karbonz is part of what makes them so tough, but I think that my hands prefer a gentle bend after all. So I may be more of a bamboo lover after all. However, if I ever need to knit cables or anything where I’m applying pressure to the needles, the Karbonz are going to be great. And, they were pretty affordable at only $14 for the set.
So that’s a lot about DPNs, but what about Magic Loop? you may ask. Yes, I magic loop, and although I haven’t sought as far and wide for the perfect circular needles, I have some thoughts.
My go-to? Addi lace. For socks, I’ll use a 32″, and I like the Addis because they are sharp and the cords are very flexible. The brassy finish tends to tarnish in my hands a bit, which is a disappointment, but in the interchangeable set (which only goes to size 4, unfortunately), they’ve swapped out a nickel finish.
I don’t particularly like the joins and cords on the Clover circular needles, so I’ve stayed away from them for socks. I find the cables are too rigid and thick for my liking. I have stayed away from small hardwood circulars, like the KnitPicks, because I’m pretty certain they’d break. And KnitPicks and I are in a fight anyway.
After hearing great things about Chiaogoo, I bought a fixed circular (red lace), and honestly didn’t like it as much as I was hoping. The cord is a plastic-coated braided steel, and is more rigid than I’d expected. The whole set is just a bit heavy, although the joins are great and the red cord is very pretty. I got to play around with a Chiaogoo interchangeable set, and I was impressed by the swivel joins, which I imagine are necessary with the rigid cords. I think these would be fun to work with, but probably not the best for magic loop.
I’ve had my eyes on the Dyakcraft Heavy Metals, and am waiting to try them out. They come in sizes 0-3, and are a steel tip with a flexible cord. At $155 for the set, I’m probably not going to get them, considering how much I prefer DPNs for socks, but you never know! I do love that they’re handmade in the US, but to be honest, I’m sure I have all those sizes of circulars somewhere in my house. Maybe someday.
And that’s my roundup of sock needles – for now! Do you have a favorite sock needle to talk about? Something I should really try? Leave a comment!
Knitted calligraphy!
I live for those little moments of synchronicity, where different interests come together or overlap in interesting ways. I try not to be too superstitious, but when the stars align just so, it’s hard not to take it as a cosmic “thumbs-up” that you’re headed in the right direction.
I had one of these moments recently in the process of researching for my dissertation. I’m looking at the ways that 19th- and early 20th-century Russians used medieval imagery and allusions in the creation of modern art and objects, and one hallmark medieval element is a decorative cyrillic script that adorns churches, monuments, and manuscripts. Here it is in its medieval form, on a church bell in Novgorod:

Novgorod – St. Sophia
Here it is in its 19th-century incarnation, in a menu prepared for the coronation of Tsar Nicholas II in 1896:

excerpt from Coronation Menu, 1896, after Vasnetsov
Wanting to talk about it intelligently, I set about finding its proper name. “Decorative majuscule” was just not going to cut it, even though that’s the best description I could find for its Byzantine predecessor, as we see here in the Theodore Psalter:

Theodore Psalter, in the British Library
What is it called? After a whole half hour of tireless searching, I found my answer, and it was a delightful one – this script is called vyaz’ (вязь), which is very closely related to the word vyazat’ (вязать), meaning “to knit”! That’s right, friends, this is “knitted” calligraphy (more accurately, probably, intertwined, or knotted, but I’m taking some liberties here…). Sweet!
Make do and mend
Yesterday, a woman came into the yarn shop clutching a grey shawl to her bosom, asking about repairing moth holes. Knitwear repair is one of my sidelines, so I nodded enthusiastically and asked to take a look.
The shawl was a charcoal grey swath of fine-gauge stockinette, in a cashmere that had been lightly felted from years of loving wear, probably one yard wide by four yards long, and had been absolutely ravished by clothes moths. Moths happen to fancy cashmere quite a lot, in all its buttery sumptuousness, and eat it right up. The shawl had a half-dozen large holes, the size of a silver dollar with the fabric completely gone, a dozen or more moderate holes where a line of stitching had been eaten away (almost always vertical or diagonal, wouldn’t you know, which is harder to fix as more live threads are cut), and twenty or more pinholes, where just a few threads had been nibbled on, but live stitches were exposed.
Insert a sad sigh here.
The shawl’s owner had been to a different repair person on the North Shore, who had reknit some of the holes in this customer’s sweaters (as the infestation of moths hadn’t been restricted to just the shawl, oh, no), and who had told her that the cost to do the same for this shawl would simply be astronomical. I’m not sure what response she was expecting to get from me, having already been told as much, but the reply she got was worse.
I refused to take the job, for any price.
In fact, I refused to quote a price. I sized up the project quickly, and realized that it would be sheer misery to fix this shawl. The trifecta of a painful repair was here – fine gauge stitches (hard to see, hard to replicate), dark color, and huge, numerous holes. I explained that we were easily looking at 15-20 hours of work, and that I could do it, but that with my life as it is (full-time graduate student, 1-year-old at home), there was no way I would do it. After she left, I thought to myself, well, maybe I should have offered to do it for $2000, and I’d plan on a 6-month turnaround time, because I could probably stand to spend 1 hour a week on it, for a very protracted number of weeks. But even then…
What I did was explain what I would do if it had been my scarf, which is to chop up the undamaged pieces and sew them into something – a little neck cozy, a cushion cover, a teddy bear. Or, chop up the pieces and sew them together into a skinny patchwork tube scarf. She was unconvinced.
Then, she asked how, if one were to repair this, one might do such a thing. I have no secrets, so I explained. You’d take a sewing needle, and you’d thread a matching yarn through the fabric and stitches in a manner like duplicate stitch, “reknitting” as you go, but anchoring the new yarn to the existing stitches on the side. I directed her toward an instructional book that helped me learn how to do knitwear repair, Flawless Knit Repair by Rena Crockett. And I assured her that, yes, the repair was possible. But would be tedious. And that I simply could not take the job on, nor did I know anyone in the area who I could direct her to.
And you know what? It’s been haunting me. Not that I want to do the job, or that I need the money (although, let’s be honest, I’d be happy with extra pin money), or that I was interested in working on this shawl. It boils down to an ideological issue, and one that I’ve been on the other side of before, with Felix Shoe Repair, the guy who just won’t fix my shoes. The issue is that I think good things deserve to be repaired, and should not be thrown away. At least three times now, I’ve brought a pair of shoes to Felix in Harvard Square, and each time, he looks at my (admittedly cheap and run-down) shoes, and says that he won’t repair them. It’s not worth it, and the repair won’t be a good one, even if he spends a lot of time on it. Every time I’m incensed, because I know that the repair is possible, I just don’t have the tools and materials to do it. He does! And I know that it’d cost the same to buy a new pair of shoes, maybe even less. But these shoes are still good, and have life left in them, and isn’t this part of the problem of today’s society where everything is so disposable, that we’re not attached to anything, that we just waste and waste, and don’t worry, we can just buy another cheap plastic…
…ahem.
And so here I was, on the other side of the counter. This woman was saying the words I know so well, “But I’d hate to just throw it out.” “I can pay, it’s not that.” “How many hours do you think it’d take?” “Well, if you won’t fix it, how would you recommend I do it myself?” “Sure, I understand. No, I know, I understand. Thank you.”
Dear woman, I wish I had unlimited hours in my life to fix your shawl. I wish that I had a summer vacation where all my needs were met, and all I needed to do in a day was roll out of bed, stroll out onto my veranda by the sea, and work on restitching what the moths so violently and thoughtlessly effaced. I wish that for this work I’d do for you, I’d be paid handsomely in gold and silks and champagne and strawberries, and in dividends paid into a 401K so I could live comfortably into old age without worrying about how the bills will get paid. While we’re at it, I wish that the shawl were actually a different shawl, more interesting and less felted, maybe in a light cream color. Because even in this fantasyland of fixing your shawl, we’re talking a lot of hours of tedious work, on a boring project, and really, I’d rather be going for a walk or reading Mother Goose with my little guy.
How do you put a price tag on that?
Heck yeah, socks!
So, I like socks. I like knitting them, wearing them, buying them, fondling sock yarn, the little itty bitty sock needles, all of it. And I love teaching other people how to knit socks, too. The problem is, knitting a sock can take a while. Sure, there are some people who crank out a knitted sock a week (ahem, Yarn Harlot), but the sheer number of stitches on tiny needles can be daunting for a new sock knitter.

For my beginner sock classes, I like to have students work with worsted-weight wool and larger needles, so they can knit up a finished product faster and see their stitches easier, too. Despite the fact that this is a pretty basic project, I wasn’t totally satisfied with the patterns available to me or my students, so I set about writing my own.
This pattern comes in 6 sizes, from a woman’s small through a men’s large (that should fit through a size 13+ shoe, if you’re brave enough to knit socks that big!), and the sizes are color-coded throughout to help you keep track of your project numbers. All the instructions are spelled out with particular clarity in the notes, so even a very beginner knitter can feel comfortable taking on his or her first pair of socks. You should be able to knit and purl and join in the round in order to knit these.

The pattern is for sale on Ravelry for $4 (click “buy now” below), and I hope you check it out! Soon, maybe you’ll be as crazy about knitting socks as I am!

-Katie


